I had previously settled on the Square D CU12L400CB as the panel of choice for my electrical service. I had planned to bring in a 400 amp service, and sub feed all of the future buildings from that service.
As I mentioned below, I had PG&E out at the site last week and they recommended a smaller 200 amp service. Here’s the meter main that I like for this application. I can sub feed 50 amps to the barn, and 125 amps to the cabin.
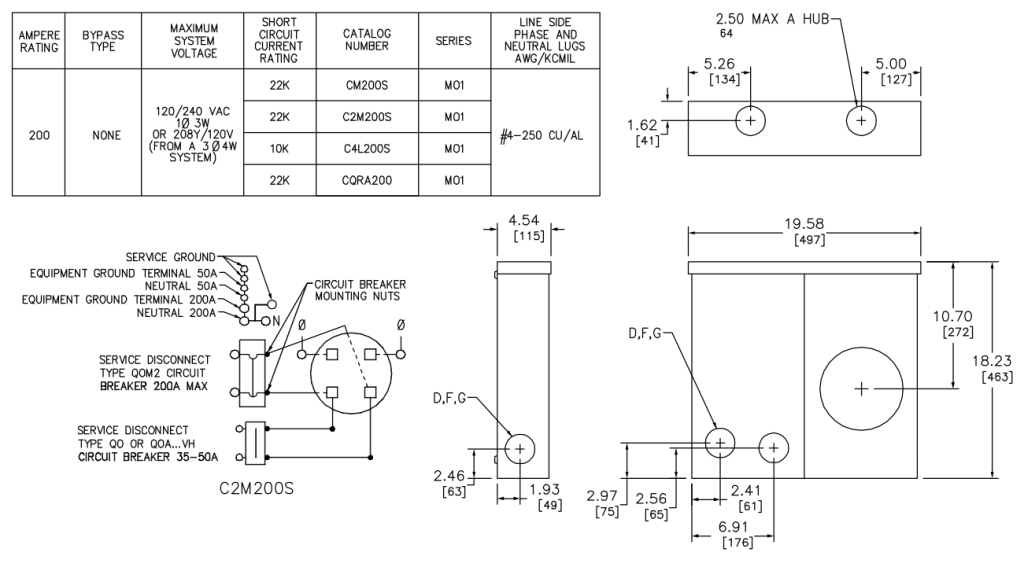
Square D C2M200S meter main
The astute observer will notice that 50 and 125 only add up to 175, not the 200 amps the service is rated for. The reason for this is that the provision for a QO breaker in this panel is limited to 50 amps, and I probably only want to feed 125 amps to the cabin because it will reduce the size of the conductors I need to run, and also the cheap QO main lug panels are rated for 125 amps. So my maximum load will be a little less than the service capacity. That’s no big deal.
I checked with the county planning department about having a second service installed if I want to build another house in the future. As usual, they started out with something along the lines of “there’s no way you can do that we will never allow it” without even letting me fully explain what it is I wanted to do. Once I managed to get the whole explanation out, then they were okay with it. If I build a second house on the property, then the cabin will be permitted as a second dwelling unit, with the future house to be considered the primary residence. Both are permitted to have separate electric meters, so I can install a second service to supply the house.
UPDATE: It turns out that I think I actually can get a 150 amp QO load center (QO12030L150G) for a pretty good price, so that’s nice as far as it goes. Forget about my 175 amp math above.