Slab Done

image

My slab and stemwalls are done, and ready for framing!

I took several pictures before this one, but the mottled light filtering through the trees is kind of a photographic nightmare.  Either the highlights are overexposed, or the shadows are underexposed.  It makes it hard to see anything in the photograph.

Serendipitously, one lone cloud just happened to pass overhead and afford me the opportunity to take a better picture.  Besides getting a good look at the concrete which I’m so pleased about, you can also see the red earth which we have out there.  Although common in the Southeast, California doesn’t have much of these soils except in the former gold country area where we are.  Sadly, I haven’t found any big gold nuggets yet.  🙂

Anyway back to the barn.  There are four piers and two small pads left to do, as described in the previous post.  Anthony should finish those up this coming week.  Then on to the carpentry!

The foundation crew used up most of the water in my 1,100 gallon tank.  I checked it and there was a little less than 100 gallons left.  I gave the neighbor twenty bucks to let me fill the tank from his well, which took about three hours.

It Goes Right Here

My engineer left the exact details of the footings and piers for the stairs and deck a little vague, so that I could adjust them to fit the site.  That works fine if it’s just me fooling around with the concrete forms, but since I decided to subcontract the foundation work my guy needs to know exactly where they go.

Deck and stair footing detail

Deck and stair footing detail

I spent a couple of hours figuring it all out, and putting together an illustration depicting exactly this.  I’m not really a draftsman, but I think I managed to get everything in there.

The Magical All Purpose Column Cap

So I was looking over my barn plans, trying to work out exactly where to tell Anthony to locate my deck post footings, and I found a problem with the framing connectors.  As drawn, the plans indicate a Simpson column cap where the supporting column holds up the deck beam, and they also indicate a beam hanger at the same location.  Those two pieces of hardware won’t be able to both be installed in the same place.

I called Loren at BGS, and he reviewed the problem and came up with a solution for me in about fifteen minutes.  Instead of two pieces of hardware, the joint can be built with the following interesting little part:

Simpson ECCLQ-SDS2.5

Simpson ECCLQ-SDS2.5

I’ll need a left-hand and a right-hand one for the two sides of the deck, and presto!  It should all fit together just fine.

While I had him on the phone we also discussed some of the details for the deck railing.  He recommended a Simpson BC8 post cap to anchor the railing post on the center of the right-side beam.

I’m mostly sharing all of this here so that I can come back and reference the part numbers later on.  There is sort of a general interest lesson though, which is that there’s no such thing as joinery anymore.  It used to be that carpenters would spend lots of time cleverly carving the ends of beams so that they would fit together just so, and make a strong joint.  Except for aesthetic reasons nobody does that anymore.  Most modern construction makes extensive use of metal connectors to join the wood framing lumber together.  It might not have the sublime beauty of traditional construction, but the steel connectors make for a stronger building.


UPDATE:

The Magical All-Purpose Column Cap is going to cost me like about $375 each, and I need two of them.  I’m not particularly thrilled with that pricing, but it does at least solve the problem.

The Foundation Is Cast In Stone

No really, I mean it literally.  🙂

Despite continued failings in my futile effort to buy a house in San José, the barn project is coming along great!  I just spoke with Anthony on the phone, and he’s finishing up the slab right now.  All that’s left for the foundation is the deck and stair piers, and the small slab in front of the walk door.

Maybe I’ll forget about buying a house, and just go live in my barn.  Hell of a commute though.  🙂

I Guess I Don’t Live In Boulder Creek After All

I went out to the Big Basin Way place to met a couple of inspectors this morning.  The regular home inspection guy said it mostly looks pretty good.  The electrical panel needs replacing and there are some plumbing issues, but nothing catastrophic.

The guy I brought out to give me a quote on earthquake bracing was a different story.  He poked around the basement and concluded that the foundation and cripple walls are a total wreck.  Here’s the deal:  The typical approach to earthquake bracing would be to bolt the sill of the cripple wall down to the foundation.  This cripple wall has no sill however, so there’s nothing to bolt.  That can be fixed, the board-and-batten basement walls can be replaced with a more modern wall that has a pressure treated sill.  All that has to happen is that you have to jack up the entire house, remove the existing walls and then rebuild them.  Oh and the concrete is old enough that the building department will probably require that it be completely replaced.  So basically everything lower than the floor joists has to go.   Probably looking at thirty to fifty thousand dollars.

Looks like no cabin for me.

The Basement Is Where I Bury The Bodies

Here’s a shot of the basement under the Big Basin Way house:

This is where I keep all my victims

This is where I keep all my victims

It’s kind of creepy, but it’s dry.  If there were more than one working light bulb that would really help chase away the scary.  It’s almost tall enough to be a shop.  Well, at my height it actually is plenty tall enough but most guys would prefer a little more headroom.  Ideally, I’d like to dig the basement down about 18 inches and pour a slab.  That would make it into a really usable space!

I’m kidding about the victims, in case you don’t get my weird sense of humor.  There is an odd little room that the previous owner had built on one side though, that’s kind of strange.  They might have kept the kidnapping victims in there, or perhaps some illegal exotic animals or something.  Given the Santa Cruz Mountains location however, it’s more likely to be where they were growing their marijuana.

Stemwalls Done

IMG_20130518_161351_901

Stemwall Northwest Inside Corner

My stemwalls were completed this week

Stemwall Foundation

Stemwall Foundation


They look pretty good.  Anthony should be back next week to add fill and pour the slab, and then the barn will be ready for framing!  I’m excited!

There will need to be some more work done with the deck and stair piers.  The stair piers in particular need to be adjusted because the location is dependent on the stair length.  That’s not specified in the plans because it will depend on the site slope.

LEDs: The Light Of The Future

I’ve been equipping my various living quarters with energy-saving lighting since about 1997.  It actually didn’t start for purposes of saving electricity, it started because the house in Chico ran hot at about 130 volts most of the time, and regular incandescent light bulbs only lasted a week.  I discovered that compact fluorescents lasted much longer, so I put them in everything.

Back then the quality of CFLs was pretty bad.  They’ve gotten better over the years, but they still have some undesirable characteristics.  Some of them are slow to warm up, the electronics are complicated and prone to failure, and they still contain a small but measurable amount of the element mercury.  You know, that stuff which is the reason you aren’t supposed to eat swordfish anymore?

Enter LED lights.  The commercial technology behind LEDs has been around since 1968, but unless you were looking for a creepy red nightlight they weren’t really of much use in typical lighting applications.  In the last couple of years however LED-based replacements for regular household light bulbs have exploded onto the scene.  Not literally of course, because that would be dangerous, but they have really taken off in the consumer market.  Every decent hardware store now has a selection of LED bulbs which are price-competitive with CFLs.

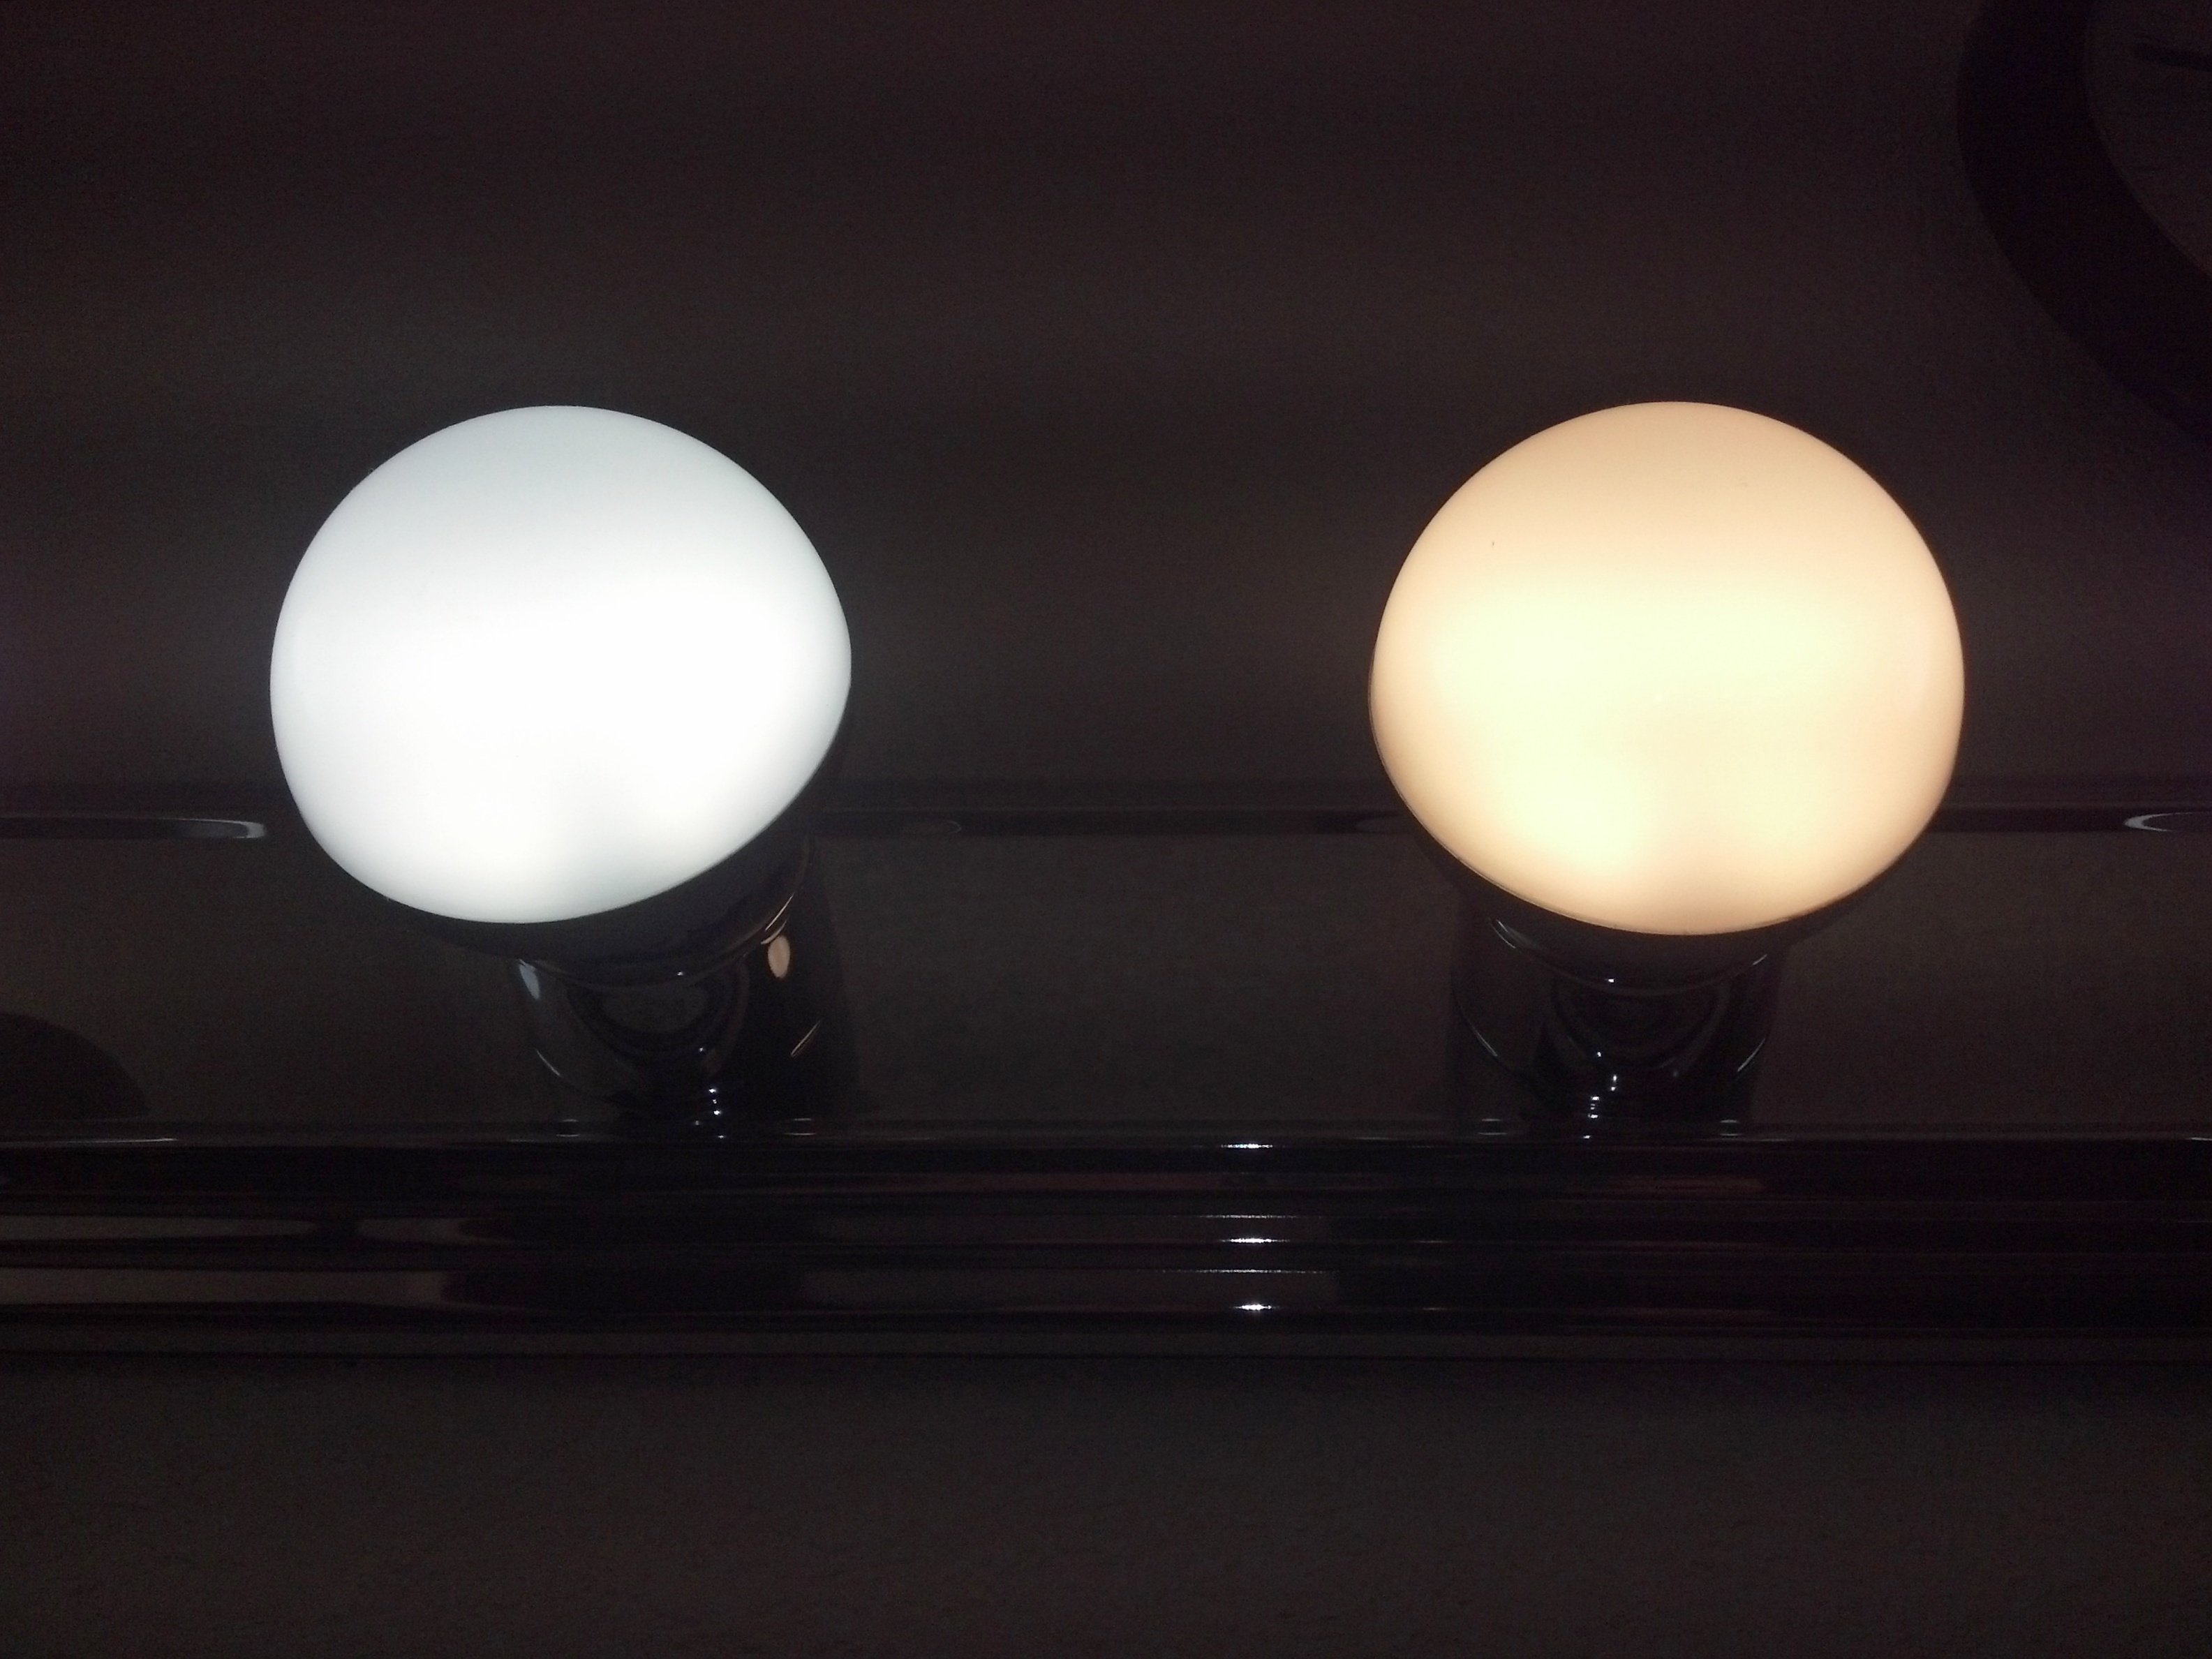
Here’s an example of some of the LEDs which I’ve installed in my house.

LED Vanity Lights

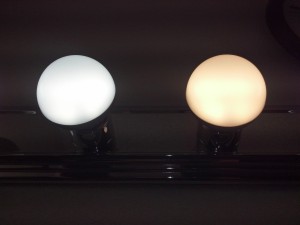
LED vanity lights from Green Tech Lights

I got these particular models from a company called Green Tech Lights that imports them directly from the manufacturer.  That means they are made by impoverished Chinese children working in sweat shops, but lets be realistic here:  Everything these days is made by children in sweat shops.  Even that stuff that’s made in the USA isn’t really made here, most of the parts are made overseas and then they just assemble a few of them together on our shores so that they can pretend they made the thing in America.  Except my backpack.  That really was made completely in America, and you know what?  It cost me about $150!  For a book bag!  So yeah, they’re made in China.  Just like everything else.  Learn to love it or be sure to finish your homework before the sun goes down.

Anyway, back to the lights.  They are available in both 5000K and 3000K color temperatures, which for those of you who aren’t lighting technology wonks means “daylight” and “warm white”.  They’re nice and bright, but I dimmed down the picture so that you can really see the difference in the color temperature between the two models.  They also have a very nice even light, much like the electricity-gobbling incandescent light bulbs they are designed to replace.  They turn on instantly and contain no mercury.  They even work in cold climates where CFLs have trouble turning on.  Try them out in your own house, and you won’t be disappointed.


Stemwall Pour Tomorrow

Anthony called me this evening, he’s all set to pour the stemwalls tomorrow.  I imagine that he will place and compact the fill next week and then pour the slab roughly midweek.

Stemwall Section Drawing

Stemwall Section Drawing

He recommended adding felt on 2 sides of the slab to allow for some movement.  I’m all for that.  He had the inspector out to look at the concrete forms, and everything’s approved and ready to go.